Döner Kebab at Home: No Rotisserie Needed Technique

Ever scrolled through TikTok at midnight and suddenly found yourself absolutely craving döner kebab? Yeah, me too. That crispy-edged, perfectly spiced meat spinning on a vertical rotisserie looks impossibly good. And then reality hits-you don’t own a döner machine. Neither do I. Neither does basically anyone outside of a kebab shop.
But but - you don’t actually need one.
The Stacked Meat Method That Changed Everything
This technique has been floating around Turkish home kitchens for ages, but TikTok blew it up last year. The concept is dead simple: instead of packing meat onto a vertical spit, you stack seasoned ground beef (or a lamb-beef mix) into a loaf pan, compress it tight,. Roast it horizontally. Then-and this is the key part-you slice thin pieces off the top and crisp them up in a screaming hot pan.
The result - legitimately good döner. Not “good for homemade” döner - actually good döner.
I was skeptical the first time I tried this. Ground beef in a loaf pan sounded like meatloaf’s sad cousin. But the texture is completely different because of how you handle the meat and how you finish it.
What You’ll Need
Let’s talk ingredients first. For about 4-6 servings:
The Meat:
- 1 kg (2.2 lbs) ground beef, 80/20 fat ratio
- 1 medium onion, grated fine
- 4 cloves garlic, minced or grated
The Spice Mix:
- 2 teaspoons cumin
- 2 teaspoons paprika (smoked is great if you have it)
- 1 teaspoon coriander
- 1 teaspoon black pepper
- 1/2 teaspoon cayenne (adjust to your heat tolerance)
- 1 teaspoon sumac (optional but worth finding)
- 1 1/2 teaspoons salt
That onion is doing a lot of work here. The moisture helps the meat bind without eggs or breadcrumbs, and the flavor gets distributed throughout. Grate it on a box grater-don’t chop it. You want onion juice and pulp, not chunks.
The Actual Process
Step 1: Make the meat mixture
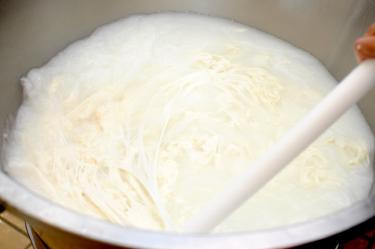
Dump everything into a large bowl. Now here’s where most people mess up: you need to mix this aggressively. I’m talking 4-5 minutes of kneading with your hands. The meat should get sticky and almost paste-like. This develops the proteins so your döner holds together when sliced thin instead of crumbling apart.
Your hands will be freezing - push through it.
Step 2: Pack it tight
Line a standard loaf pan with plastic wrap, leaving overhang on all sides. Add the meat in small portions, pressing down hard after each addition to eliminate air pockets. Really smash it in there. Once full, fold the plastic over the top and press down firmly one more time.
Refrigerate for at least 2 hours. Overnight is better. This firms everything up and lets the flavors meld.
Step 3: Roast low and slow
Preheat your oven to 150°C (300°F). Remove the plastic wrap, flip the meat loaf onto a baking sheet lined with parchment or a wire rack, and roast for about 90 minutes. You’re looking for an internal temperature around 70°C (160°F).
The loaf will look - not great at this point. Kind of grey and sad - don’t worry about it.
Step 4: The magic happens here
Let the meat rest for 15 minutes, then slice it as thin as humanly possible. We’re talking 2-3mm if you can manage it. A sharp knife helps enormously. An electric knife helps even more.
Heat a cast iron or heavy skillet over high heat. Add a tiny bit of oil-just enough to barely coat the surface. Working in batches (don’t crowd the pan), lay your thin slices in a single layer and let them sit untouched for 60-90 seconds. You want crispy edges and some charred spots.
Flip once, cook another 30-45 seconds, and you’re done.
That sizzle, those crispy bits, that smell-this is the moment it all comes together.
Why This Actually Works
Real döner gets its texture from thin layers of seasoned meat stacked on a spit, slowly rotating past a heat source. The outer layer crisps while the inside stays juicy. Slicing shaves off that crispy exterior.
Our method mimics this in a different order. The low roast cooks everything gently and evenly. Slicing thin creates maximum surface area. The hot pan creates that crispy exterior on each piece.
You’re basically doing the last step of döner cooking-the part that matters most-in a controlled environment where you can get every piece perfectly crispy.
Serving Suggestions That Don’t Suck
Döner is versatile, but some combinations just work better.
Classic wrap style: Warm lavash or pita bread, spread with garlic sauce (yogurt + garlic + lemon juice + salt), add döner meat, top with sliced tomatoes, raw onion,. Pickled peppers. Maybe some fresh parsley - roll tight.
Döner box: Rice or fries on the bottom, döner meat piled on top, drizzled with both white garlic sauce and hot sauce. Pickled cabbage on the side. This is the late-night street food version and honestly might be my favorite.
Salad situation: If you’re trying to be slightly healthier about things, a big pile of chopped romaine, cucumber, tomatoes, and red onion with döner meat scattered over the top and a lemony yogurt dressing works really well.
The garlic sauce is non-negotiable in my house. Mix 200g plain yogurt with 2 minced garlic cloves, juice of half a lemon, 2 tablespoons olive oil, and salt to taste. Let it sit for 20 minutes before serving so the garlic mellows slightly.
Common Mistakes and How to Avoid Them
Using lean beef: That fat content matters. Go 80/20 or even 70/30. The fat keeps things moist during roasting and helps with crisping later.
Not mixing long enough: Seriously, your arm should be tired. Under-mixed meat falls apart when sliced thin.
Slicing too thick: Thick slices won’t crisp properly and will have that meatloaf texture you’re trying to avoid. Thin is everything here.
Crowding the pan: Each piece needs contact with hot metal. Work in batches. It takes longer but the results are worth it.
Skipping the rest: Let that roasted meat loaf sit before slicing. Hot meat shreds; rested meat slices clean.
Variations Worth Trying
Once you’ve got the basic technique down, experiment a bit.
Lamb-beef blend: A 50/50 mix of ground lamb and beef tastes more like what you’d get at a proper kebab shop. Lamb has a distinctive flavor that beef alone can’t match.
Chicken döner: Swap in ground chicken thighs (not breast-too lean). Adjust spices by adding some oregano and reducing the cumin slightly. Cook to 75°C (165°F) internal.
Extra crispy method: After the initial pan fry, some people return the meat to a 200°C (400°F) oven for 5 minutes spread on a baking sheet. Gets even crispier edges.
A Realistic Time Expectation
Let’s be honest about timing here. This isn’t a 30-minute weeknight dinner.
- Mixing and packing: 15 minutes
- Chilling: 2+ hours (overnight better)
- Roasting: 90 minutes
- Resting and slicing: 20 minutes
- Pan frying in batches: 15-20 minutes
Total active time is maybe 45 minutes. But the whole process from start to eating spans 4+ hours minimum.
Here’s the good news: you can do the roasting step ahead of time. The meat loaf keeps in the fridge for 3-4 days. So on a Sunday, roast your meat. Then on Tuesday night, slice and pan-fry just what you need in 15 minutes. Weeknight döner becomes totally doable.
Is It Actually Like Restaurant Döner?
Honestly? About 85% of the way there.
The flavor is spot-on if you nail the spice mix. The texture of the crispy bits is perfect. What you miss is that specific layered quality that comes from actual stacked meat slices and the gradual rendering over hours on a spit.
But for something you can make in a regular home kitchen with a loaf pan and a skillet? It’s kind of remarkable how close you can get. Definitely closer than any frozen döner product or sad supermarket version.
Try it once. You’ll probably end up making it monthly like I do.