Chamber Vacuum Sealers: The Fermentation Game Changer
If you’ve ever tried fermenting vegetables at home, you know the struggle. Air pockets - uneven results. That one batch of kimchi that went funky in all the wrong ways.
I spent years fighting with zip-lock bags and weighted plates before discovering chamber vacuum sealers. And honestly? My fermentation setup has never been the same.
What Makes Chamber Sealers Different
Most people are familiar with external vacuum sealers-those countertop machines you see on late-night infomercials. They work fine for dry goods and freezer storage. But try sealing anything with liquid, and you’ve got a mess on your hands.
Chamber sealers operate on a completely different principle. Instead of sucking air out of a bag from the outside, they place the entire bag inside a sealed chamber and remove air from the whole space. The pressure equalizes, meaning liquids stay put.
This matters enormously for fermentation. You can seal brines, marinades, and wet vegetables without worrying about liquid getting sucked into the machine.
Why Fermenters Are Obsessed
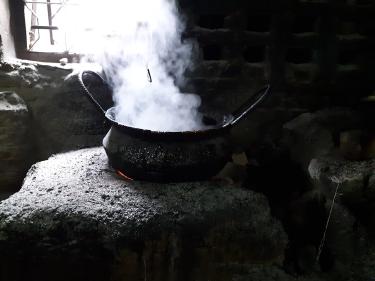
Here’s the deal: fermentation is basically a controlled decay process. You want specific bacteria to thrive while keeping the bad guys out. Air-specifically oxygen-is enemy number one for many fermentation styles.
Traditional methods use water locks, weights, and careful monitoring. Chamber vacuum sealing offers a shortcut that’s surprisingly effective.
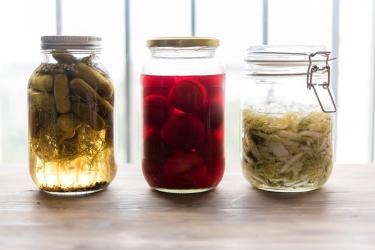
When you vacuum seal vegetables in brine, you’re creating an anaerobic environment from the start. No air pockets hiding in cabbage leaves. No surface exposure where mold can take hold. The lactobacillus bacteria you want can get to work immediately.
I’ve had ferments that normally take 2-3 weeks finish in 10 days using this method. The flavors develop faster because there’s consistent contact between the brine and vegetables throughout.
The Compression Effect
Something unexpected happens when you vacuum seal produce: compression.
Those air spaces inside cucumber cells? Gone. The cellular structure breaks down slightly, allowing brine to penetrate deeper and faster. This is actually the same principle behind compression in high-end restaurant kitchens-chefs use it to infuse watermelon with basil or create intensely flavored fruit preparations.
For fermenters, compression means:
- Faster brine penetration
- More consistent texture throughout
- Reduced fermentation time
- Fewer failed batches from uneven salt distribution
The texture difference is noticeable. Vacuum-compressed fermented pickles have a satisfying crunch that’s more uniform than traditional methods produce.
Real Numbers on Cost
Let’s talk money, because chamber sealers aren’t cheap.
A decent home-use chamber sealer runs between $800-1,500. Commercial units push well past $3,000. That’s a significant investment compared to a $50 external sealer.
But consider the math differently:
Chamber sealer bags cost roughly $0. 08-0 - 15 each. External sealer bags run $0 - 25-0. 50. If you’re sealing regularly-say 20-30 items per week for sous vide prep and fermentation-you’ll save roughly $300-400 annually on bags alone.
Over 3-4 years, a chamber sealer can actually cost less than an external model when you factor in consumables. Plus they’re built like tanks. My VacMaster VP215 is going on seven years with zero issues.
Beyond Fermentation: Sous Vide Prep
Once you have a chamber sealer, you’ll find uses you never considered.
Sous vide cooking becomes dramatically easier. Marinating proteins? Vacuum compression forces marinades into meat in minutes rather than hours. I’ve done 30-minute marinades that taste like overnight soaks.
Rapid pickling works brilliantly too. Seal vegetables with vinegar brine, let them sit for an hour, and you’ve got quick pickles with flavor that typically takes days to develop.
Infousing oils and spirits happens faster under vacuum as well. Herb-infused olive oils that normally need weeks of steeping can achieve similar results in days.
Choosing Your First Chamber Sealer
The market has gotten more competitive recently, which is good news for home users.
Entry-level options ($700-1,000): The Avid Armor USV32 and VacMaster VP210 sit in this range. They handle 10-12 inch seal bars and work well for home quantities. Pump speeds are slower than commercial units, but unless you’re sealing 50+ bags daily, you won’t notice.
Mid-range ($1,200-2,000): The VacMaster VP215 and similar models offer faster pumps, larger chambers, and more durable construction. If you’re serious about fermentation or sous vide cooking, this tier makes sense.
What to skip: Avoid used commercial units unless you can verify maintenance history. Those machines log thousands of cycles, and pump rebuilds cost hundreds of dollars.
Also skip anything without a proper oil-lubricated pump. Dry-pump chamber sealers exist but lack the vacuum strength for serious fermentation work.
My Current Fermentation Setup
After years of experimentation, here’s what works for me:
- Prep vegetables - slice, salt if needed, mix with any spices
- Add 2-3% brine - by weight of vegetables, not volume
- Seal at 99% vacuum - maximum removal without crushing delicate items
- Store flat in the refrigerator - cold fermentation gives better flavor control
The burping step matters. Fermentation produces carbon dioxide, and bags will balloon if you don’t release it. Some people install one-way valves, but I find manual burping gives me a chance to taste progress anyway.
Temperature affects speed dramatically. Room temperature ferments finish in 5-7 days. Refrigerator ferments take 2-3 weeks but develop more complex flavors.
Common Mistakes to Avoid
**Over-vacuuming delicate vegetables. ** Soft items like ripe tomatoes can’t handle full vacuum. Use the chamber’s manual mode to stop at 80-85% for fragile produce.
**Sealing too close to the liquid line. ** Leave at least 3 inches between liquid level and seal point. Even chamber sealers can pull liquid into the seal area if you’re careless.
**Ignoring bag quality. ** Cheap bags fail at seals and can’t handle the pressure differential. Stick with 3-mil or thicker bags designed for chamber use.
**Forgetting temperature. ** Seal cold items when possible. Warm liquids release more vapor during vacuum, which can compromise seals.
Is It Worth the Investment?
That depends on your fermentation volume and patience level.
If you make kimchi, sauerkraut, or pickles once a month, traditional methods work fine. The learning curve isn’t steep, and the equipment cost is minimal.
But if you’re fermenting weekly, experimenting with different vegetables, or combining fermentation with sous vide cooking, a chamber sealer transforms your process. Failure rates drop - consistency improves. You spend less time babysitting and more time enjoying results.
I ferment year-round now-hot sauce bases in summer, krauts in fall, preserved lemons in winter. The chamber sealer handles all of it without complaint.
For me, the investment paid off within the first year. Your mileage will vary based on how deep you want to go down the fermentation rabbit hole.
But if you’re reading an article this specific about vacuum sealing and fermentation, something tells me you’re already pretty far down that path.